Hello folks 👋, hope you are doing well.
Today, we’ll take a look at Cypress, a new kid in town(of Testing 😅). We will understand basic stuff like how to set it up, use it, write a test and more.
This blog post is the first part of Angular testing with Cypress series,
- Introduction to Cypress with Angular (👈 we are here)
- Unit tests using Cypress & Angular
Agenda #
- What is Cypress?
- Setup
- Running it for the first time
- Let’s make it work
- Writing the first test
- Setting up the CI
What is Cypress? #
Cypress is a brand new Testing Framework that’s not based on Selenium and hence does not carry it’s technical debts.
It’s written from scratch while keeping in mind modern web apps and common testing problems testers have been facing for ages.
Cypress comes with a lot of unique features like,
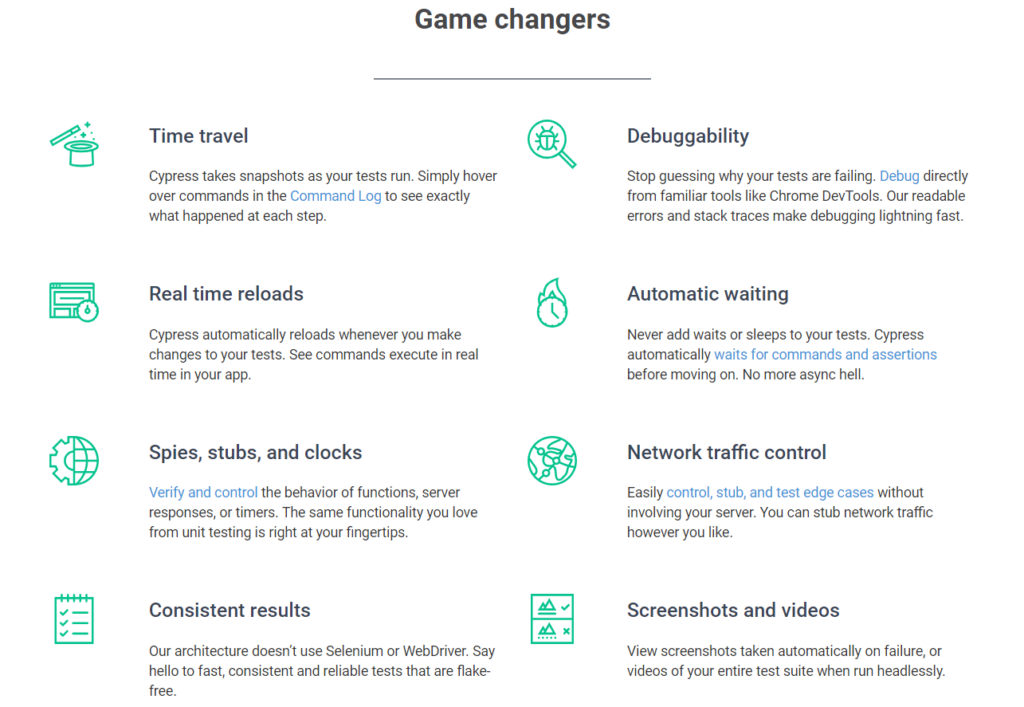
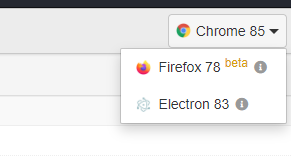
Cypress also supports all modern browsers like Chrome, Firefox, Edge, Brave and Electron.
They say “Product is as good as its documentation”. It is especially true for Cypress because of which it is way ahead of its competitions 🚀.
Setup #
1. Run following command to use Angular Schematics to configure your Angular project with Cypress in one command. Make sure you remove protractor as it would be redundant.
ng add @briebug/cypress-schematic --addCypressTestScripts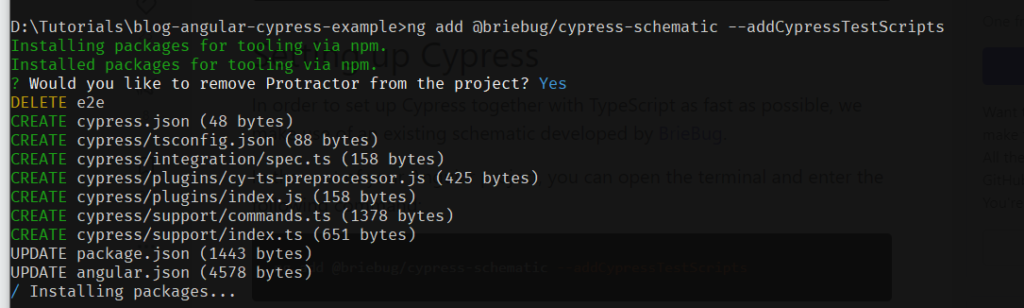
2. If this is your first time setting up Cypress on your computer, it will also download binaries as it comes with Interactive Test Runner UI. After the above 👆 command executes, you will see the project structure like below 👇.
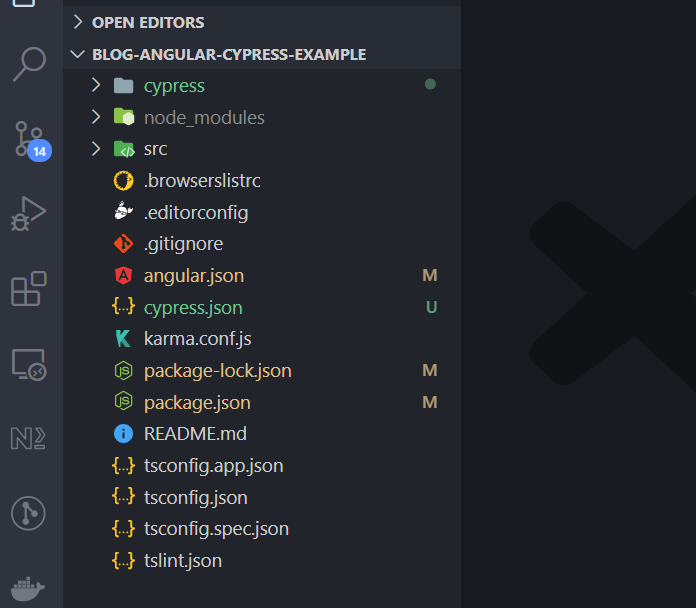
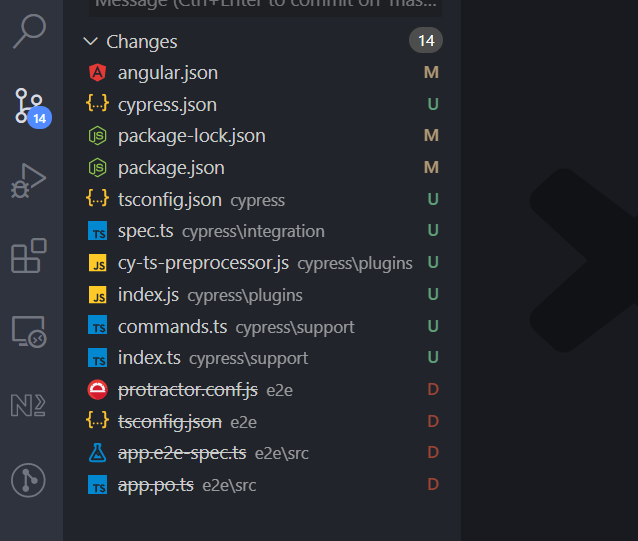
3. As you can see, usual e2e folder has been replaced by Cypress. Following are all the files where schematics made changes in order to configure Cypress.
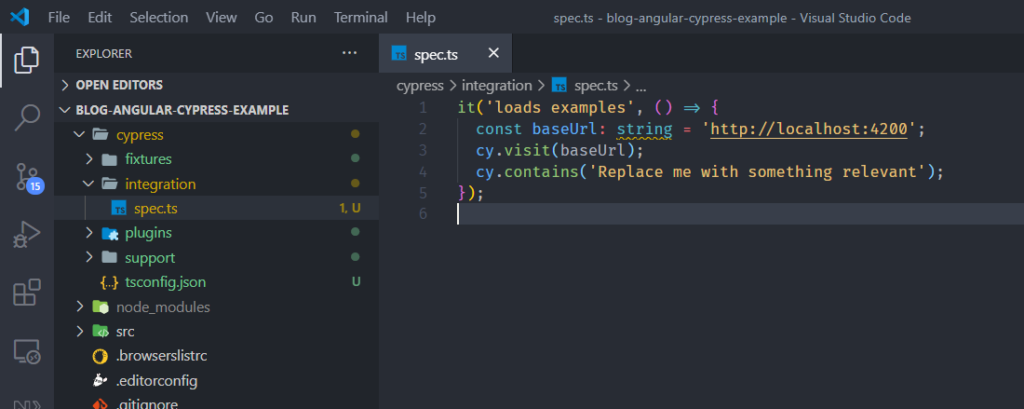
4. This is the boilerplate e2e test cypress sets up in the project. (fixtures folder 👉 is added when you run the test for the first time)
Running it for the first time #
1. Now let’s see what happens when you run Cypress for the first time. execute following command,
npm run e2e2. Above commands does two things in one go, start the Angular app and start the Cypress UI.
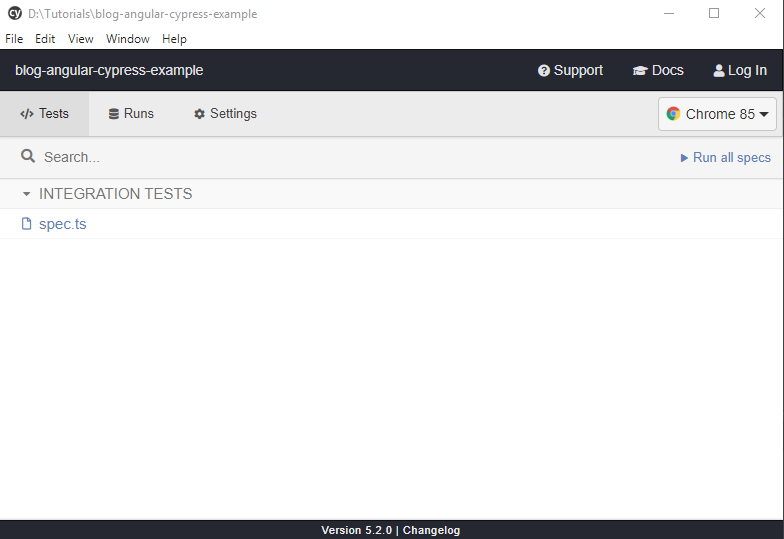
3. When you execute the above command, Test Runner UI will be launched like below, All the test files located inside cypress/integration folder will be shown in the UI in a hierarchical manner.
4. You can choose any browser and launch the test by clicking on it,
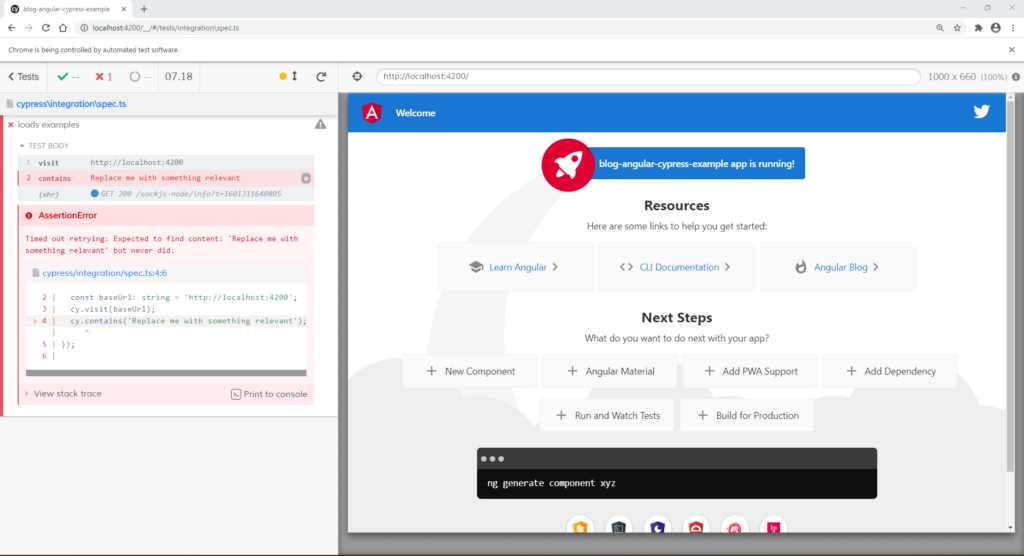
5. And it seems like it… failed. Wait what???
Let’s make it work #
1. Cypress comes with a lot of features that enables rapid test development.
2. As you can see in the last image, Cypress has pretty much given us an idea of what must have happened. But in order to see what else we can do with Cypress let’s click on Print to console button.
3. We will get all the necessary info printed out on Developer Console.
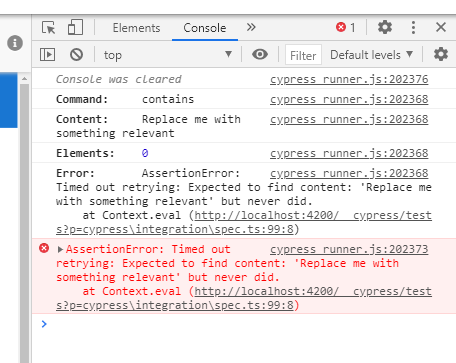
4. Wait, did I just say Developer Console? Sure I did 😉. We can use entire Developer Tools when using cypress. I am pretty sure it would sound like a dream if you have ever used Protractor 😅.
5. Okay enough chitchat. Let’s try to fix it. Change spec.ts file to check for string “Here are some links to help you get started” which already exists on the page. It will re-run the test as soon as you save the file because of it’s real-time reload feature as explained earlier.
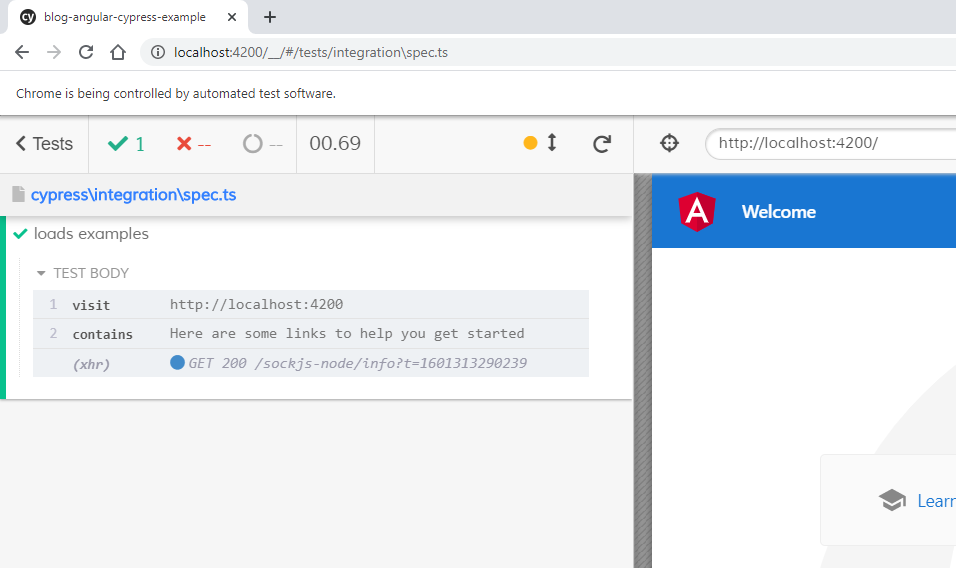
6. See how easy it is to write, debug and fix a test.
Writing first test #
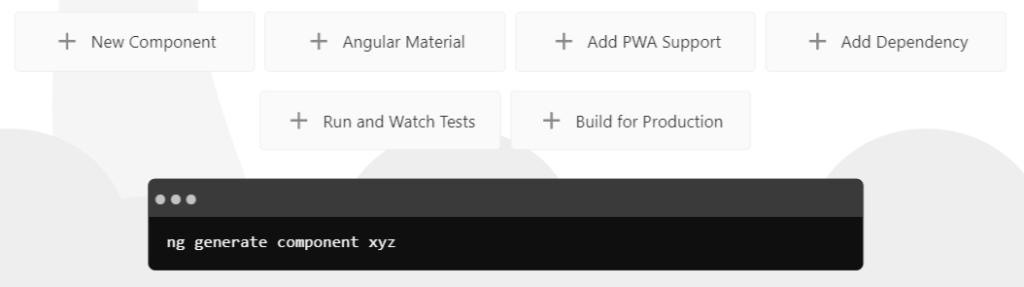
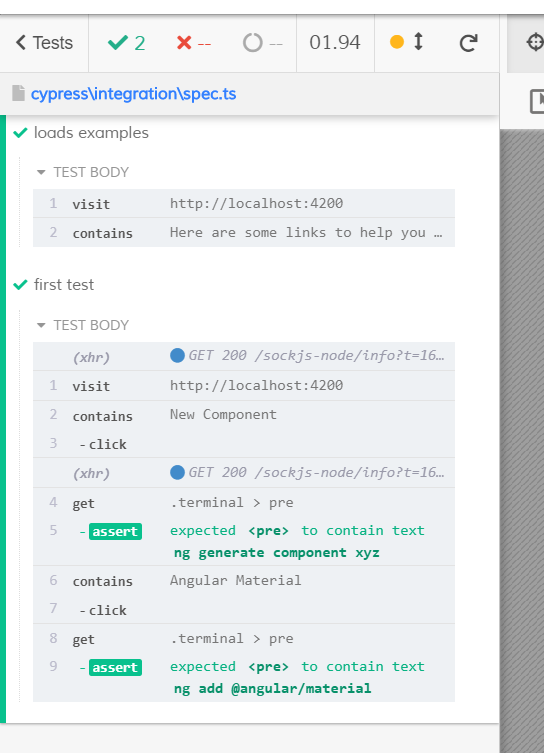
1. let us write our first test where we will make sure, that when we click on any of the following buttons, command in the black terminal below them changes.
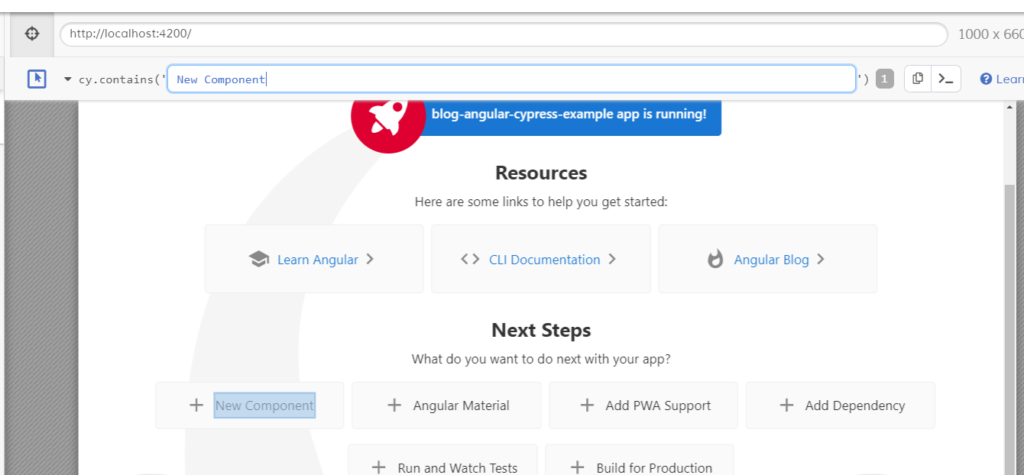
2. Earlier I mentioned rapid development. Let us see what I meant by that. Look at the following feature, I can literally check what expression will get me the “New Component” button in Cypress Selector toolbar.
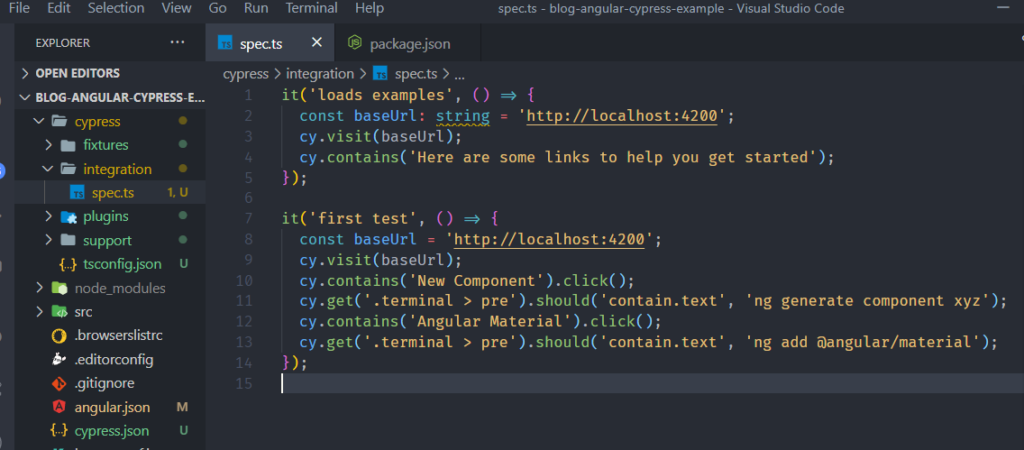
3. We can do the same to find terminal text as well. Now we will use these selectors to write a test. Our test should look like below,
4. When we hit save button, Cypress will locate this newly added test and will re-run all tests from selected spec file.
5. Okay, we have successfully run our first test 🚀🚀. You can also pretty much figure out what we are doing in the test from beautiful cypress logs.
Setting up the CI #
1. We will start by installing a library Start-server-and-test which starts the server, waits for URL, then runs test command; when the tests end it shuts down the server.
npm install --save-dev start-server-and-test2. Add following command to scripts in package.json
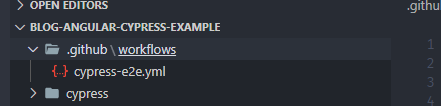
"e2e:ci": "start-server-and-test start http://localhost:4200 cy:run"3. Now, let’s set up a workflow to start e2e tests whenever we push any changes to the master branch. Create new .github > workflows > cypress-e2e.yml file like below,
4. Paste the following configuration in the cypress-e2e.yml file.
# This workflow will do a clean install of node dependencies, build the source code and run tests across different versions of node
# For more information see: https://help.github.com/actions/language-and-framework-guides/using-nodejs-with-github-actions

name: End-to-End tests

on:
  push:
    branches: [ master ]

jobs:
  build:

    runs-on: ubuntu-latest

    strategy:
      matrix:
        node-version: [10.x, 12.x, 14.x]

    steps:
    - uses: actions/checkout@v2

    # Sets up multiple Node.js environment specified as per array in matrix above
    # This will result in running same workflow for different environments.
    - name: Use Node.js ${{ matrix.node-version }}
      uses: actions/setup-node@v1
      with:
        node-version: ${{ matrix.node-version }}

    - name: Install node-modules
      run: npm ci

    - name: Run e2e tests
      run: npm run e2e:ci
5. Now push all your change to Github and it should start the end-to-end workflows as below,
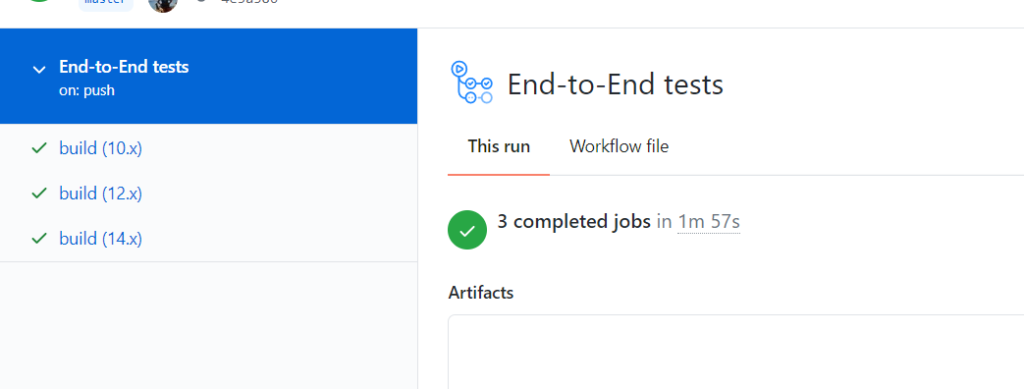
6. As you can see, same workflow ran for all specified Node.js versions.
Hurray 🥳🥳🥳 we have not only learned about cypress today but have written a test, debugged it and set up CI in the end.
In the next post, we will learn about how to implement unit tests using cypress and more so stay tuned for that.
To learn more about cypress, visit cypress website.
For reference code, visit my Github repository here.
Hope you liked this post, feel free to share if you find it helpful.
For more such content, click here.
Till next time, Take care and keep learning 😎🤘